Daily Yoga Stretches That Improve Flexibility for Beginners at Home
Struggling with flexibility as a beginner can feel overwhelming, especially when tight hamstrings, hips, and lower back get in the way. Fortunately, establishing a daily routine of simple stretches can transform your body and enhance your overall comfort. Let’s dive into the first stretch to kickstart your journey.
Downward Dog Yoga Pose That Stretches Hamstrings and Calves at Home
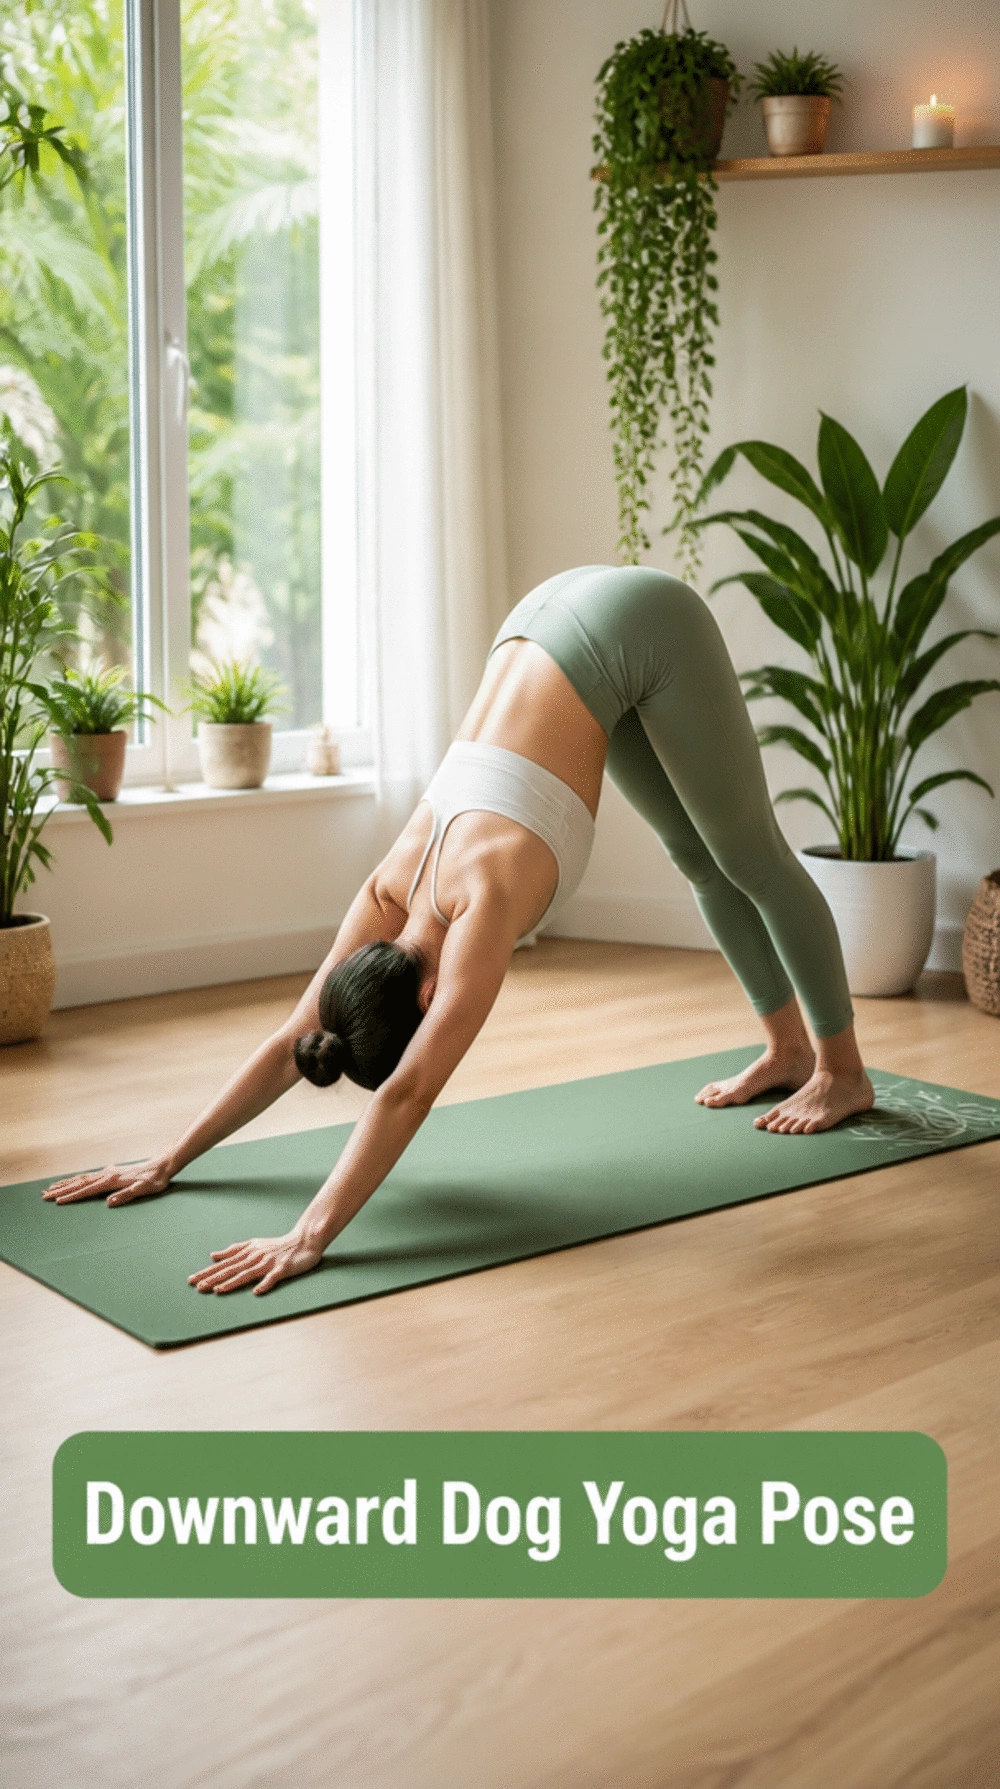
Experience the strength and flexibility benefits of the Downward Dog pose.
As an Amazon Associate I earn from qualifying purchases. Affiliate links may earn me a commission at no extra cost to you.
Understanding the Downward Dog Pose's Benefits: The Downward Dog is a fundamental yoga pose that not only stretches hamstrings and calves but also strengthens the entire body. Proper alignment is crucial; keeping your spine straight and your heels reaching towards the mat maximizes its benefits while preventing injury.
Where Most People Get Stuck: Many beginners tend to let their back round excessively, which can hinder the stretch's effectiveness. Instead, focus on lifting your hips towards the ceiling while pressing your heels down. This adjustment can transform your experience and enhance flexibility.
- ★Position your feet shoulder-width apart and press your palms firmly into the mat.
- ★Engage your core and breathe deeply, holding the pose for 30 seconds to a minute.
- ★Consider using a Non-Slip Eco-Friendly Yoga Mat for better grip while practicing this pose.
⭐ Top Products for Stretching at Home
✨ Editor's Pick
Non-Slip Eco-Friendly Yoga Mat
★★★★★
Our Score: 5.0/5
This mat provides a stable surface for performing the Downward Dog, enhancing comfort and grip.
View on Amazon →Extra Thick Home Workout Mat
★★★★½
Our Score: 4.5/5
This mat offers extra cushioning for those who prefer more comfort while stretching.
View on Amazon →Yoga Wheel and Strap Set
★★★★☆
Our Score: 4.0/5
This set helps improve flexibility through various poses, complementing the Downward Dog.
View on Amazon →💡 Quick Tips:
- Focus on Alignment: Keep your spine straight and avoid rounding your back.
- Breathe Deeply: Inhale as you lift your hips and exhale as you press your heels down.
- Modify as Needed: Use a yoga block under your heels if they don’t reach the mat comfortably.
Seated Forward Fold Yoga Stretch Beginners Can Do on Any Firm Mat
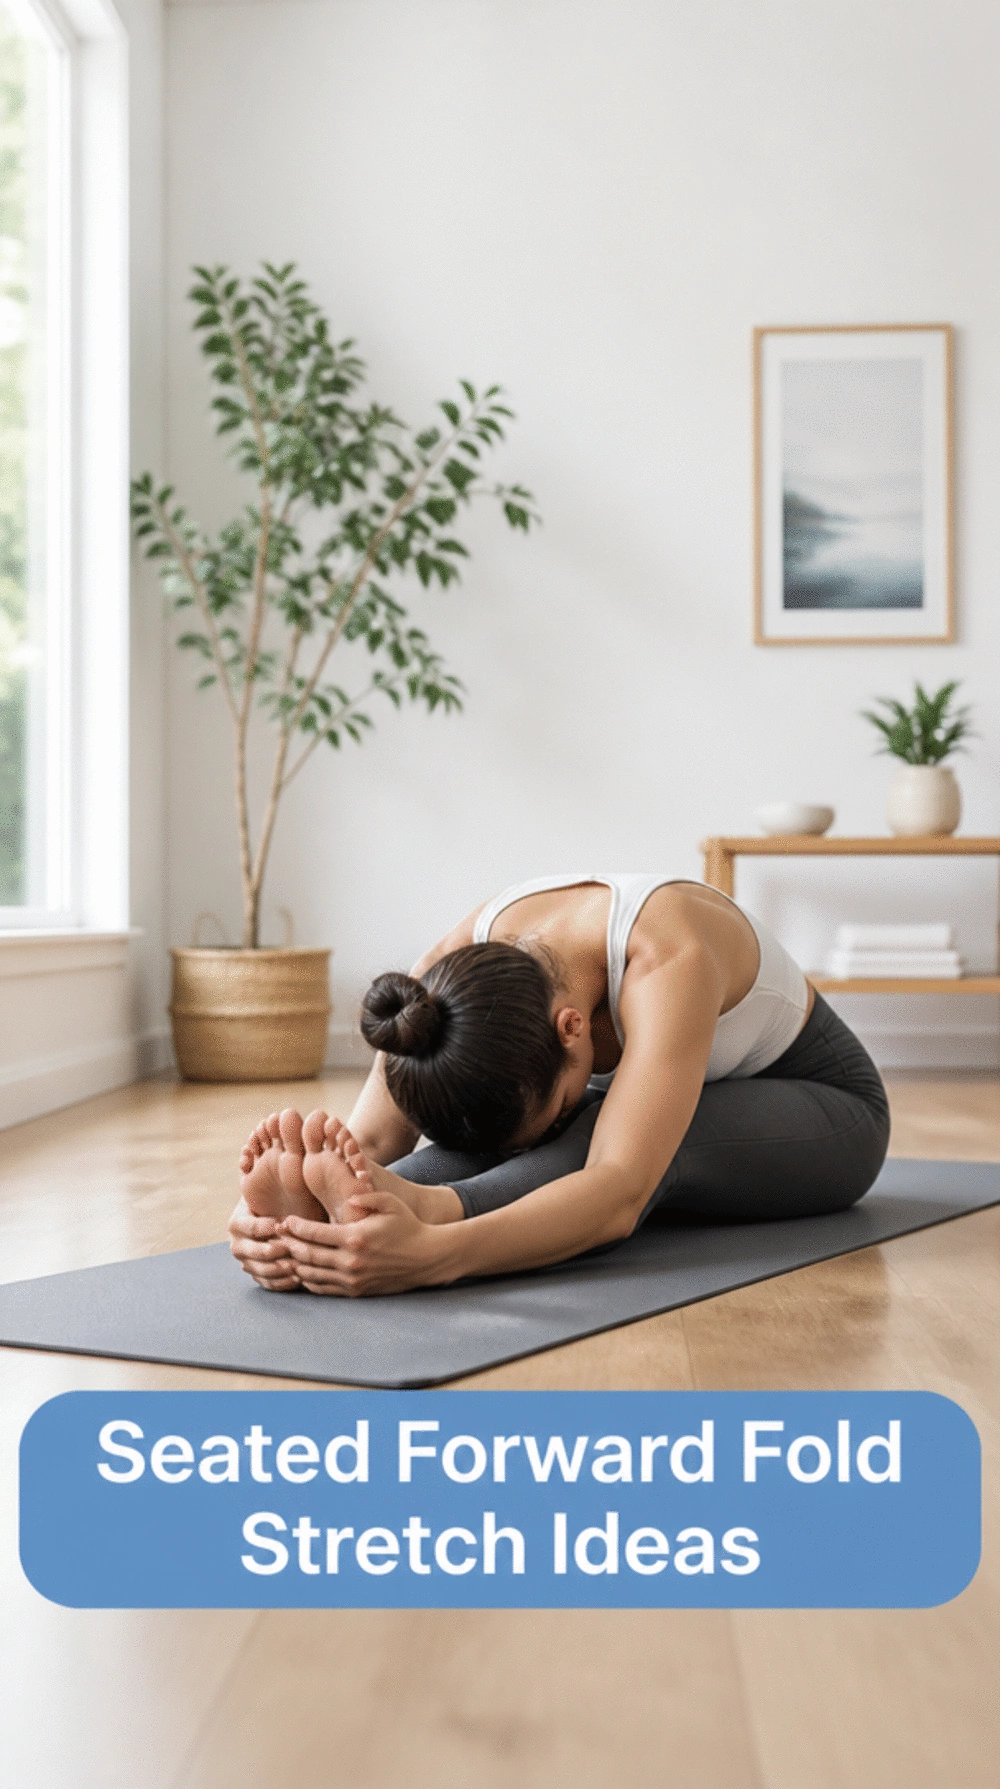
Experience relaxation and flexibility with this beginner-friendly stretch.
Understanding the Seated Forward Fold: This gentle stretch is key for releasing tension in the hamstrings and lower back. By sitting tall and reaching forward, you promote flexibility while also enjoying a moment of mental relaxation. It's perfect for beginners, as it can be done on any firm surface.
Where Most People Get Stuck: Many beginners tend to round their backs while leaning forward, thinking that this increases the stretch. Instead, focus on keeping your spine straight as you fold. This ensures you're getting the maximum benefit from the stretch without risk of injury. For instance, you might find it helpful to visualize a string pulling your head forward, lengthening your spine instead of bending it.
- ★Focus on keeping your spine straight as you reach forward.
- ★Breathe deeply to enhance relaxation while holding the pose.
- ★Use a cushion or folded blanket under your hips for added comfort.
⭐ Recommended for Yoga Stretching
✨ Editor's Pick
Non-Slip Eco-Friendly Yoga Mat
★★★★★
Our Score: 5.0/5
This non-slip mat ensures stability for beginners during the Seated Forward Fold stretch.
View on Amazon →Sequoia Meditation Cushion
★★★★☆
Our Score: 4.0/5
This cushion offers support and comfort for beginners during seated stretches.
View on Amazon →Extra Large Exercise Mat
★★★★½
Our Score: 4.5/5
A spacious mat that offers comfort and stability for various stretches and exercises.
View on Amazon →🚀 Quick Tips:
- Keep your spine straight: Focus on lengthening rather than folding to maximize the stretch.
- Incorporate deep breathing: Use slow, deep breaths to enhance relaxation during the pose.
- Use a cushion: Place a cushion or folded blanket under your hips for added comfort and support.
Supine Pigeon Yoga Move That Releases Hip Tightness Without Full Pigeon
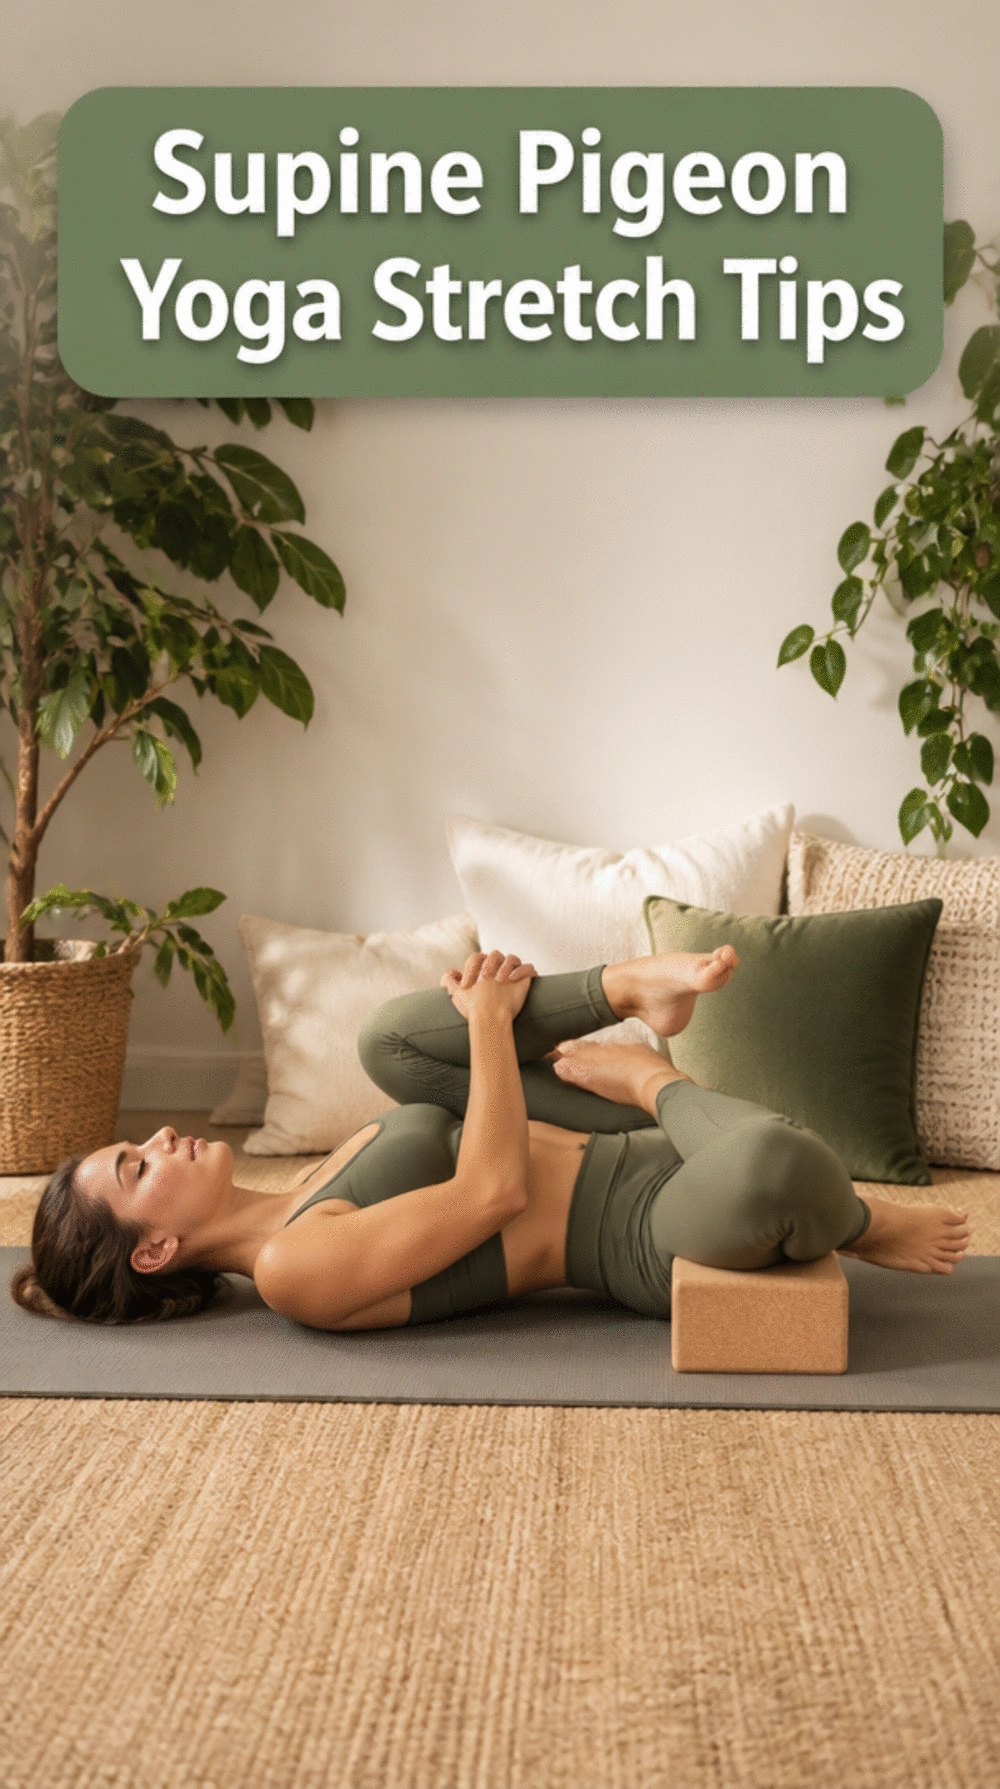
Gentle hip opening for improved flexibility and relaxation.
Understanding the Supine Pigeon Move: The Supine Pigeon pose is a fantastic way to release hip tightness without straining yourself. By lying on your back and crossing one ankle over the opposite knee, you gently stretch your hips, enhancing mobility and preventing injury. This beginner-friendly alternative to the full Pigeon pose makes it accessible and effective for many.
Where Most People Get Stuck is in the belief that they have to master the full Pigeon pose to gain hip flexibility. This often leads beginners to skip essential modifications like the Supine Pigeon. By focusing on this gentler version, you can encourage gradual improvement in flexibility without overwhelming your body, making your practice more enjoyable.
- ★To perform, lie on your back and cross one leg over the other, gently pulling the uncrossed leg toward your chest.
- ★Focus on maintaining a relaxed breath as you hold the position for deeper stretches, enhancing overall relaxation.
- ★Consider using a Natural Cork Yoga Blocks Set for extra support when needed.
⭐ Best Products for Hip Stretching
Complete Pilates Equipment Kit
★★★★½
Our Score: 4.5/5
This all-in-one kit provides essential tools for toning and stretching effectively at home.
View on Amazon →XL Foam Yoga Wedge Blocks
★★★★☆
Our Score: 4.0/5
These extra-large wedges provide support for deep stretches and poses, enhancing flexibility.
View on Amazon →✨ Editor's Pick
Natural Cork Yoga Blocks Set
★★★★★
Our Score: 5.0/5
These durable cork blocks enhance stability and support during challenging poses for beginners.
View on Amazon →💡 Your Quick Start Guide:
- Focus on Relaxation: Allow your body to relax into the pose, letting go of tension gradually.
- Breath Awareness: Use deep, steady breaths to enhance the stretch and deepen your relaxation.
- Adjust for Comfort: Use a yoga block or cushion under your knee if you feel discomfort.
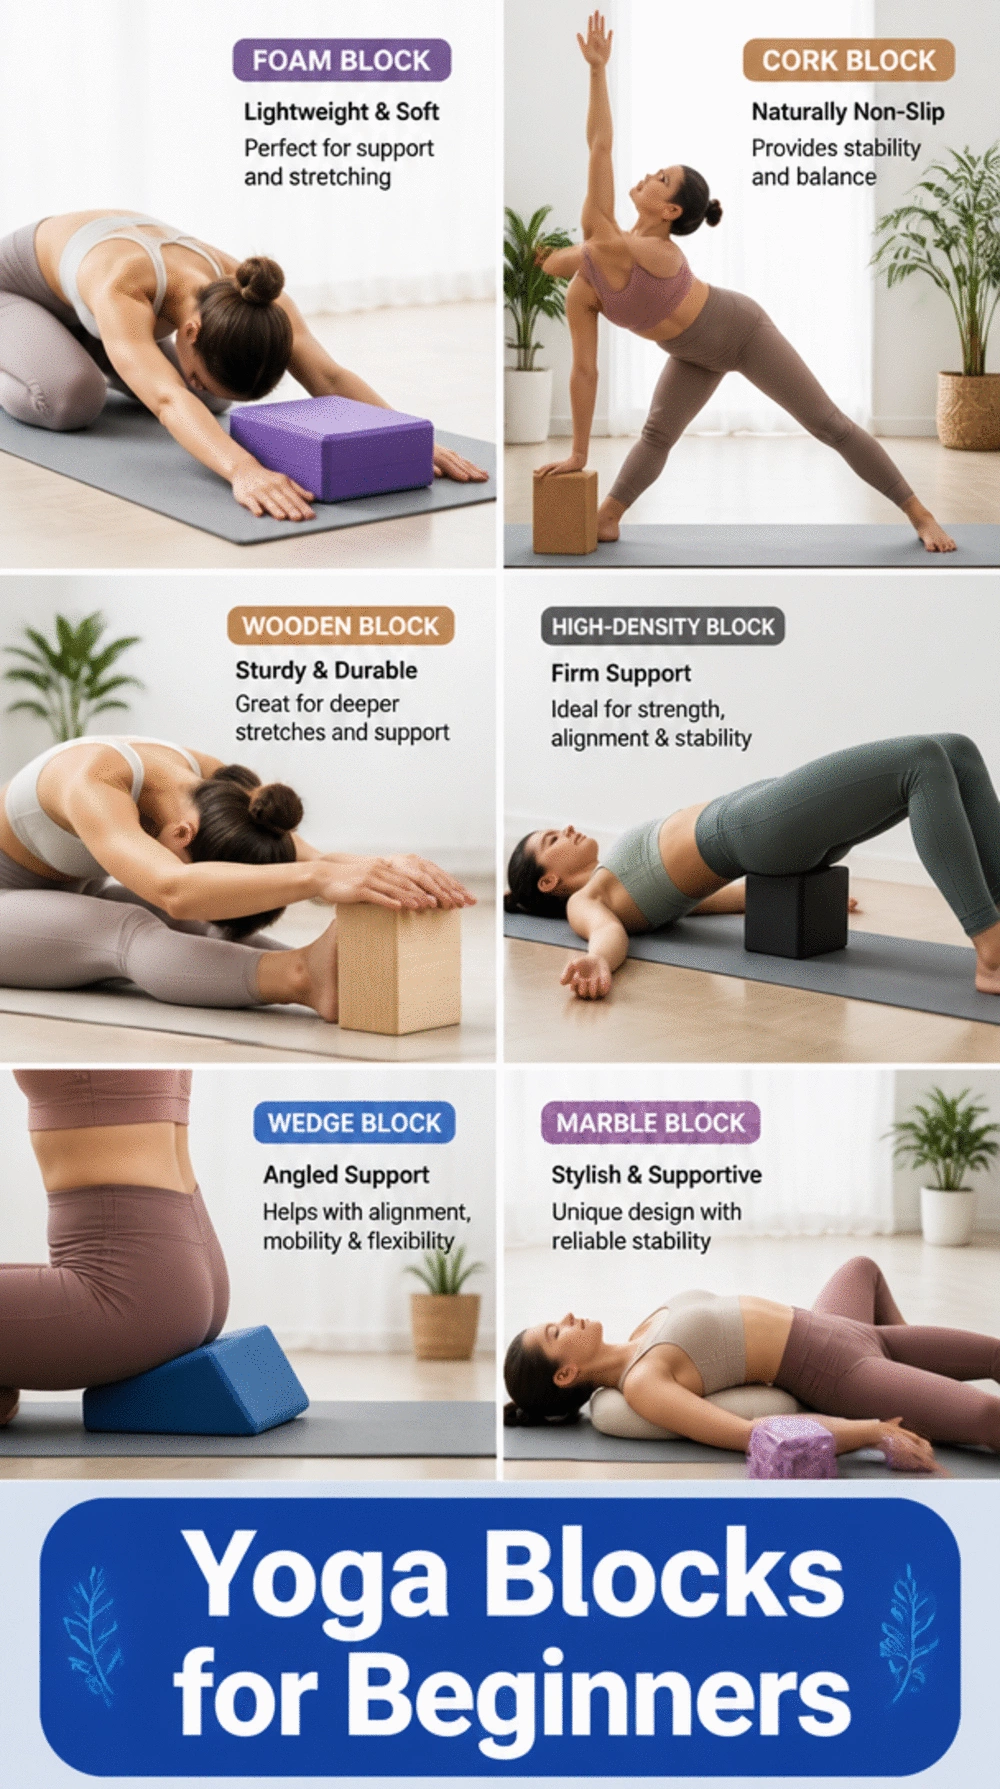
Yoga Block That Brings the Floor Closer for Tight-Hipped Beginners
Enhance your flexibility with supportive yoga blocks for better practice.
The Benefits of Using Yoga Blocks: Yoga blocks are essential tools for beginners, especially those with tight hips. They provide stability and support, allowing you to modify poses comfortably and deepen your stretches without straining. With blocks, you can access various poses more confidently and effectively.
What People Rarely Consider is the psychological comfort that using blocks can bring. Many beginners underestimate how much more accessible yoga becomes when they have the right props. For example, using blocks during a forward fold can provide a sense of accomplishment, making it easier to focus on your breath and relax into the pose.
- ★Use blocks to adjust poses that feel out of reach, like the seated forward fold.
- ★Choose a block based on the material that feels comfortable in your hands—foam or cork are great options.
- ★Don’t force any pose; instead, use blocks to help maintain proper alignment and posture.
⭐ Top Products for Yoga Support
✨ Editor's Pick
Sturdy Foam Yoga Block Set
★★★★★
Our Score: 5.0/5
These blocks provide excellent support while making poses more accessible for tight-hipped beginners.
View on Amazon →Cork Yoga Blocks Set
★★★★☆
Our Score: 4.0/5
Natural cork blocks are eco-friendly and great for providing essential support during yoga poses.
View on Amazon →High Density Yoga Blocks
★★★★½
Our Score: 4.5/5
Lightweight yet durable, these blocks are perfect for stability and support in various poses.
View on Amazon →💡 Quick Tips:
- Positioning Is Key: Use your blocks to support your hands or feet for better stability.
- Choose Comfort: Opt for foam blocks if you prefer a softer grip during stretches.
- Stay Aligned: Ensure your shoulders are relaxed and aligned to maintain good posture while using blocks.
You’re doing great! Taking action, even in small ways, shifts everything. Remember that every gentle stretch contributes to greater ease in your body, and those subtle efforts truly add up. This journey is about building a sustainable practice, not striving for instant perfection.
🌟 What Helps Most:
- Always listen to your body; gentle movement is key for better body mobility.
- Allow yourself to use yoga blocks to find comfort and support in each pose.
- Consistency over intensity will lead to lasting flexibility.
Thread-the-Needle Yoga Stretch That Eases Upper Back and Shoulder Tension
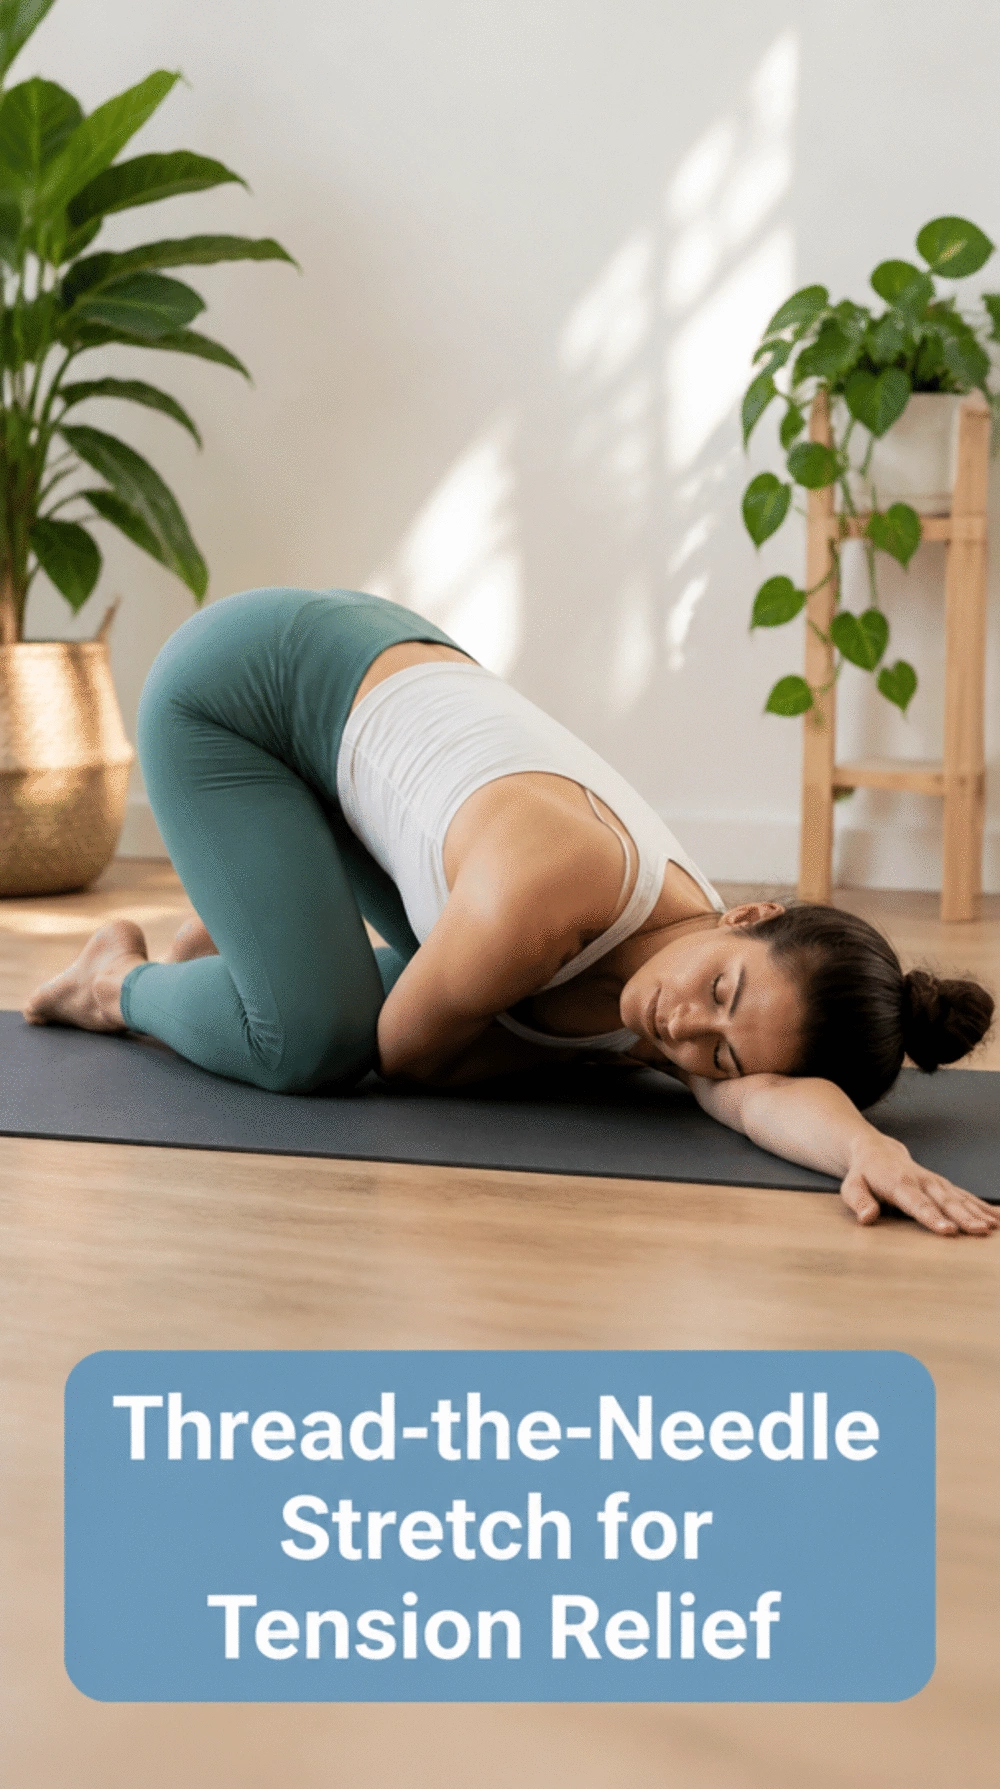
Relieve upper back and shoulder tension with this gentle stretch.
Understanding Thread-the-Needle Stretch: This accessible pose effectively targets upper back and shoulder tension, promoting relaxation and flexibility. By threading one arm under the opposite shoulder, you'll notice a gentle stretch across the back, which can significantly improve your overall mobility when practiced consistently.
Where Most People Get Stuck is ensuring proper shoulder alignment during the stretch. Beginners often overlook the subtle but crucial aspect of keeping both shoulders grounded. This adjustment not only enhances the stretch but also prevents strain, allowing for deeper relaxation and relief in the upper body.
- ★Begin in a comfortable seated position, and gently bring one arm under the opposite shoulder.
- ★Focus on breathing deeply as you hold the stretch, allowing your body to relax further.
- ★Combine this stretch with other poses for a comprehensive upper body relief routine.
⭐ Recommended for Upper Body Relief
Deep Tissue Massage Set
★★★★½
Our Score: 4.5/5
This set is perfect for enhancing recovery after Thread-the-Needle poses, easing tension effectively.
View on Amazon →✨ Editor's Pick
Home Gym Storage Rack
★★★★★
Our Score: 5.0/5
Organize your yoga accessories to maximize your practice and enhance relaxation during stretches.
View on Amazon →All in One Yoga Wheel Set
★★★★☆
Our Score: 4.0/5
This versatile set enhances your stretching, providing support and relief for upper body tension.
View on Amazon →🚀 Quick Tips:
- Maintain Shoulder Placement: Keep both shoulders grounded to deepen the stretch and prevent strain.
- Focus on Your Breath: Inhale deeply and exhale slowly to enhance relaxation during the stretch.
- Incorporate Props: Use a yoga block or pillow under your head for added support and comfort.
Reclined Butterfly Pose Yoga Move That Passively Opens the Inner Thighs
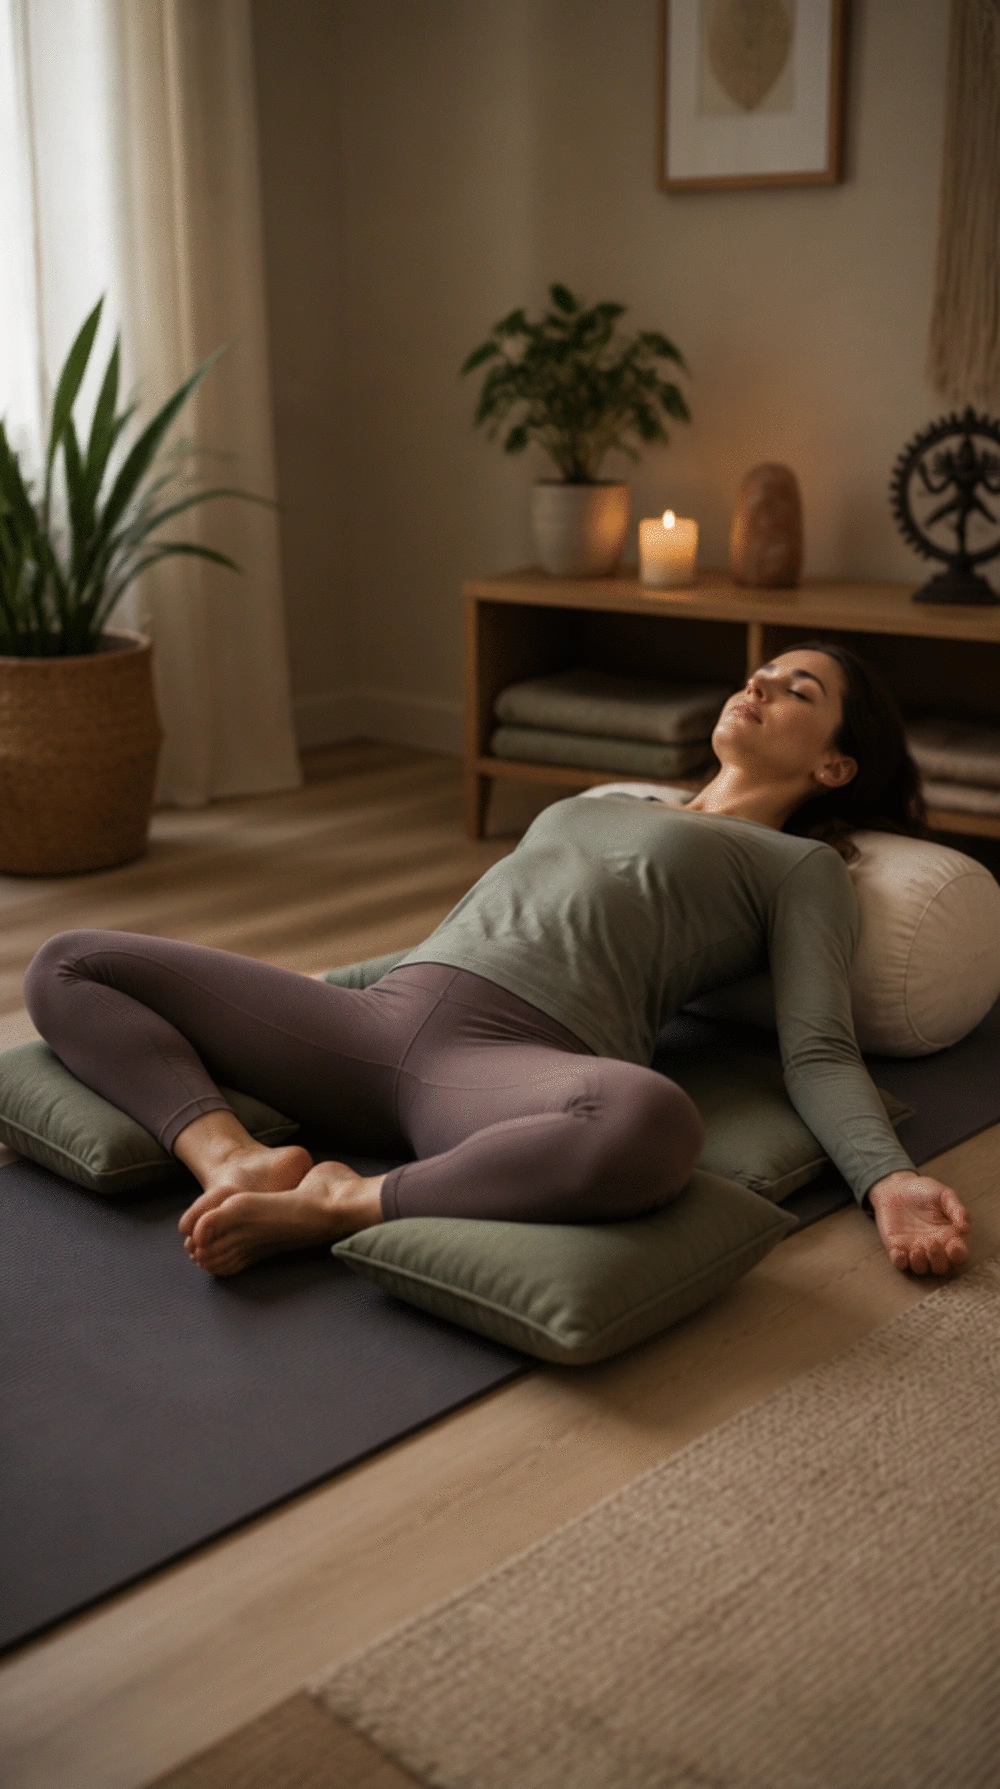
Gently release inner thigh tension with this calming stretch.
Understanding the Reclined Butterfly Pose: This pose addresses inner thigh tightness by encouraging relaxation and opening the hips. By lying back and allowing the soles of your feet to touch, you create a gentle stretch that promotes flexibility and increases blood flow to the area.
Where most people get stuck is remembering to breathe deeply and relax into the stretch. Beginners often tense their bodies, which can inhibit the benefits of the pose. Try to focus on your breath, allowing each exhale to help you sink deeper into the stretch, enhancing your experience.
- ★Position the soles of your feet together, letting your knees fall outward.
- ★Use props like the Sturdy Foam Yoga Block Set for support.
- ★Avoid attempting to force your knees down; let gravity work.
⚠️ A Common Slip-Up:
Many beginners underestimate the value of using props. Consider incorporating a Meditation Bolster Cushion to elevate your back and enhance comfort while maintaining relaxation.
⭐ Best Products for Inner Thigh Stretching
Cork Yoga Blocks with Strap
★★★★½
Our Score: 4.5/5
The eco-friendly cork blocks provide essential support and enhance your comfort during the Reclined Butterfly pose.
View on Amazon →Meditation Bolster Cushion
★★★★☆
Our Score: 4.0/5
Enjoy longer holds in the Reclined Butterfly pose with this comfortable bolster cushion that enhances relaxation.
View on Amazon →Sturdy Foam Yoga Block Set
★★★★★
Our Score: 5.0/5
The high-density foam blocks provide excellent support, making your Reclined Butterfly pose more comfortable.
View on Amazon →💡 Quick Tips:
- Focus on Your Breathing: Deep, slow breaths help you relax and enhance the stretch’s benefits.
- Use Props for Comfort: Consider a cushion or block under your back for added support and relaxation.
- Stay Mindful: Keep your awareness on how your body feels, adjusting the stretch as needed for comfort.
The Yoga Strap That Turns Inflexible Hamstring Stretches Into Real Progress
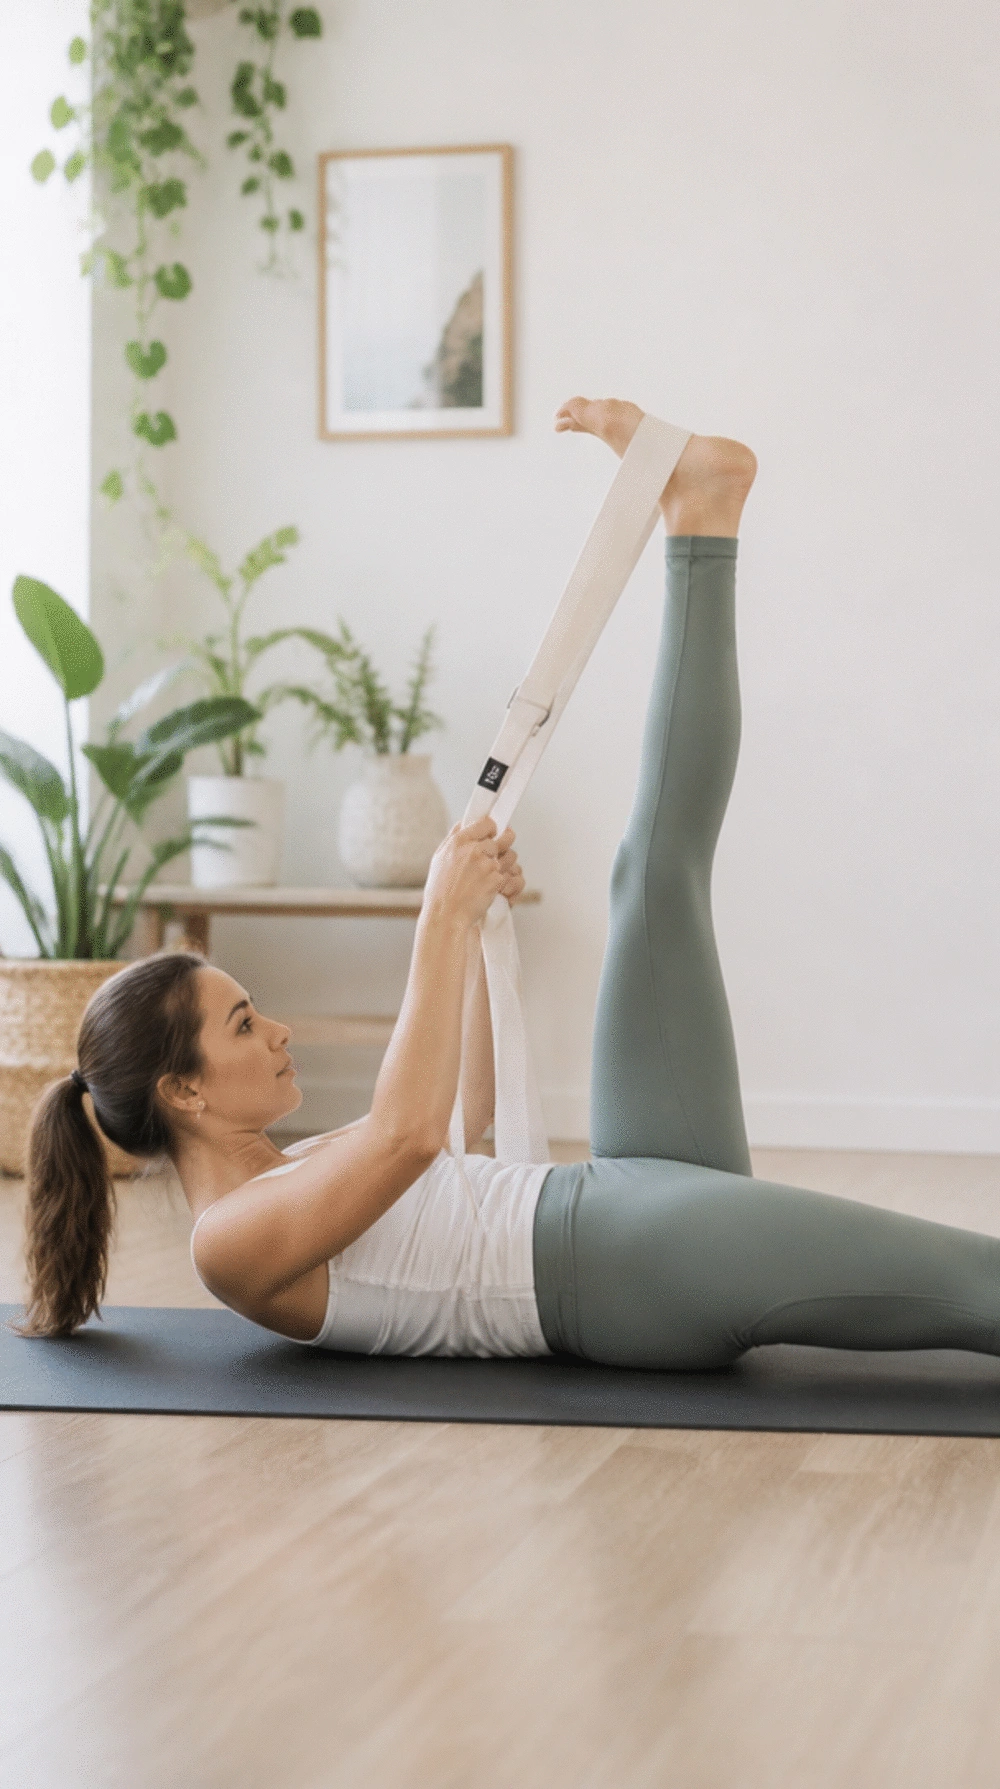
Achieve deeper stretches and improved flexibility with the right yoga strap.
How a Yoga Strap Transforms Your Flexibility Journey: A yoga strap is a simple yet powerful tool that can significantly improve flexibility, especially for those struggling with tight hamstrings. By allowing you to gently pull yourself deeper into stretches, a strap gives you the confidence to progress safely and effectively. It brings a sense of control, making your practice feel more achievable and less frustrating.
Where Most People Get Stuck: Many beginners overlook the importance of proper strap technique. They might hold the strap too tightly or not utilize it at all, missing out on its full benefits. For instance, during a hamstring stretch, using the strap properly can mean the difference between a mild stretch and a truly effective one. Relaxation and gradual deepening are key.
- ★Grip the strap with both hands, keeping elbows soft to avoid strain.
- ★Integrate the strap into various poses for enhanced support and depth.
- ★Avoid overstretching; listen to your body while using the strap.
⭐ Top Picks for Stretching Straps
✨ Editor's Pick
Trideer Stretching Strap with Loops
★★★★★
Our Score: 5.0/5
This durable strap with loops enhances hamstring flexibility and promotes consistent practice safely.
View on Amazon →Elastic Yoga Stretching Strap
★★★★½
Our Score: 4.5/5
This versatile strap's 12-loop design enhances various stretches beyond just hamstrings.
View on Amazon →Heavy Resistance Bands for Workouts
★★★★☆
Our Score: 4.0/5
Use these bands for strength training while enhancing your flexibility routine effectively.
View on Amazon →🚀 Quick Tips:
- Grip the strap firmly: Hold it with soft elbows to ease tension in your arms.
- Use it consistently: Incorporate the strap into your daily stretches for better hamstring flexibility.
- Combine with other stretches: Use the strap during various poses to deepen your stretches effectively.
You now have seven effective stretches to enhance your flexibility at home. Choose one or two that resonate most with you, and remember that each small step you take can lead to significant improvements.
With patience and consistency, you'll notice how *each gentle stretch contributes to your overall well-being*. Explore the journey of flexibility at your own pace, and you'll find moments of ease weaving into your daily routine.

Lara V. Hargrove
Lara V. Hargrove is a passionate yoga enthusiast and wellness advocate dedicated to helping individuals cultivate mindful home yoga practices. With years of experience as a yoga practitioner and a deep understanding of yoga philosophy, Lara shares her insights and expertise through thoughtful reviews and practical guides. She believes in the transformative power of yoga and is committed to helping others create harmonious spaces for their practice.